
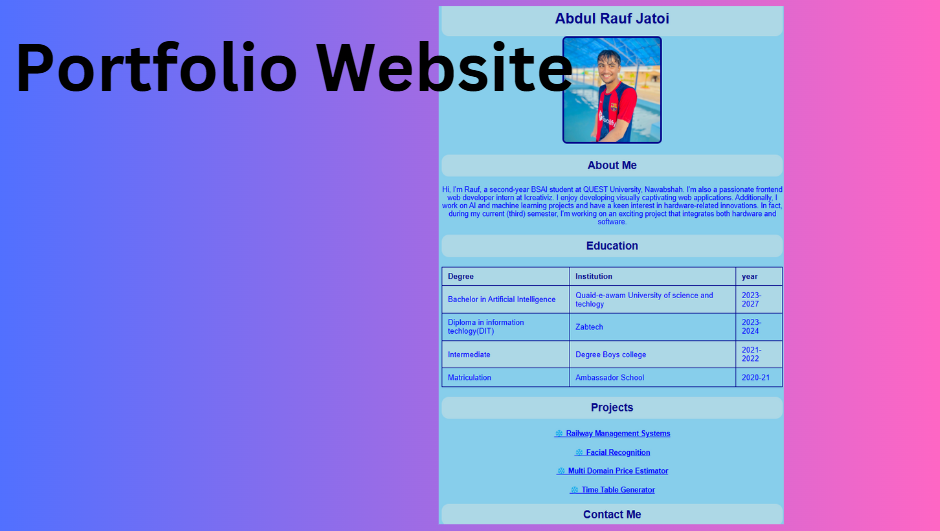
In this text-based tutorial, I will talk about how we can build a simple website like a portfolio for you, which has some sections like a header for your name, a section where you tell about yourself, your education, the projects you have worked on, and other stuff like that. Above, you can see my simple portfolio that we will recreate and see the code step by step.
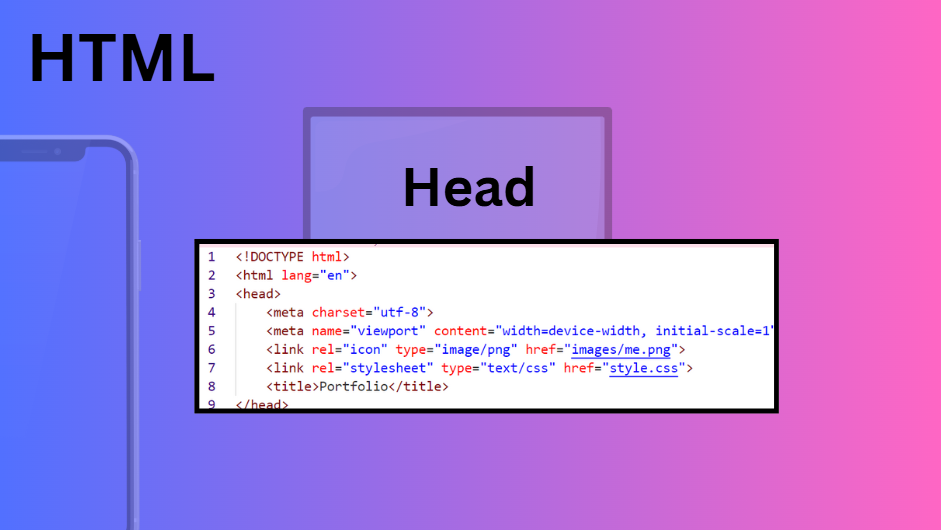
First, let's see the HTML basic code step by step before diving into the CSS. Above, you can see the basic head section where I first explain the boilerplate code like <!DOCTYPE HTML> and <html lang="en">. The language is set to English, and the doctype tells the browser that we are using HTML5 for this website. The title tag contains the title of the web page, and then I add meta tags for responsiveness based on the screen size. I also add an icon from the images section and link the styles so I can add CSS. It was a simple head section, and I closed it with </head>.
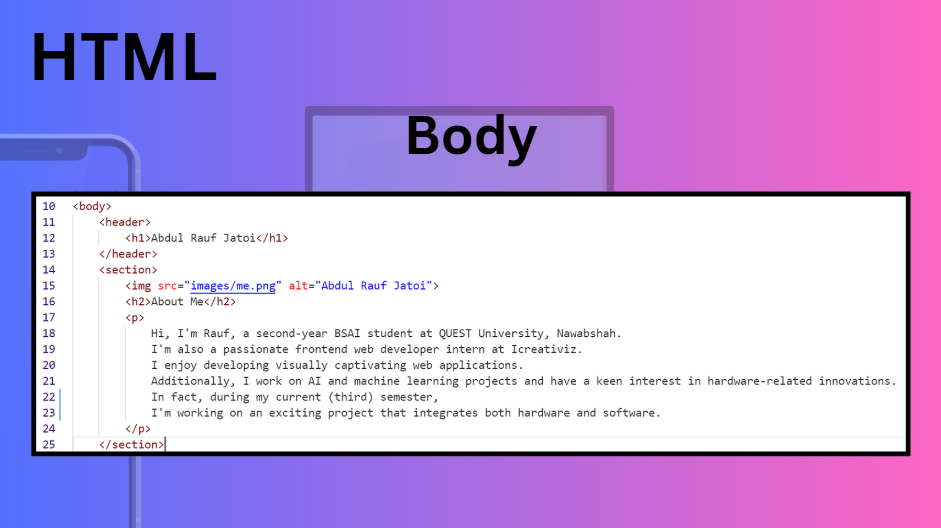
So after the head, we come to the body, the main part that is mostly shown to the user on a website.
In the body, there are multiple sections, but let's start with the header and the about me section. In the header tag, I add the heading,
and in the section tag, I add the about me information, like "I'm a 2nd year AI student" and similar details.
The section starts like <section> "and here you add the info" </section>. I didn't add an ID to the section
for now because that will be another topic for the next video where I will be talking about navigation in a website. Anyway, this was the basic header and about me sections as you can see in the code above.
I hope you understand it too 🙂.
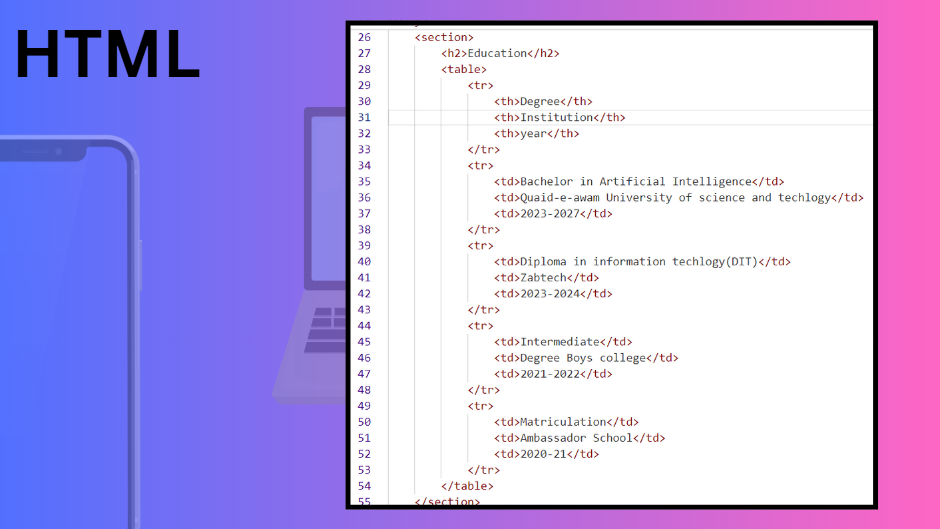
So after the header and the about me section, I added the education section again in the section tag without any ID because most of the design was the same for all sections. However, if it was a little different, then I would have to add the IDs. In the education section, I added the information about my education in table form using the <table> tag. Inside the table tag, I used the <tr> tag for the rows, the <th> tag for the headings, and the <td> tag for the data. Then I closed the table tag and the section tag. It was that simple.
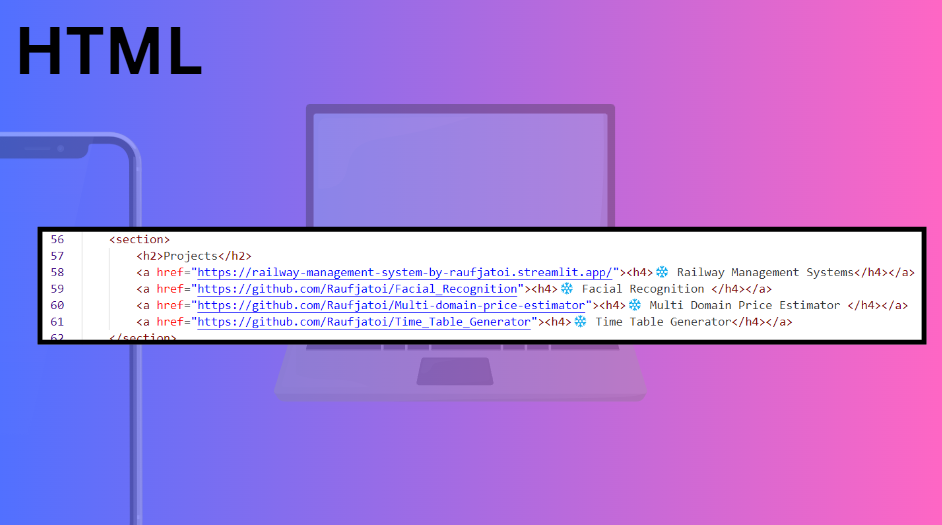
Now I have added the projects section, which includes my projects with links so the user can view my projects and visit them via the links.
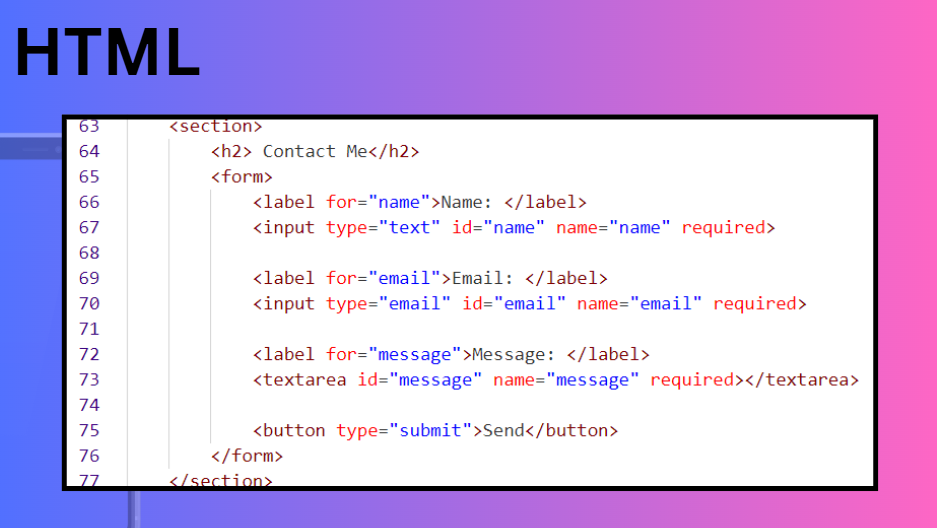
After the projects section, I added a nice contact me section for users who want to contact me via the form below or, in your case, above. You can see the form with labels and input tags to get the input and tell the user what to put. However, I didn't add the action yet, which means the form is not working yet, but you can make it work by adding the action like go to your email or something like that in the form so ye this was it for the contact me section i hope you understand the code too above.
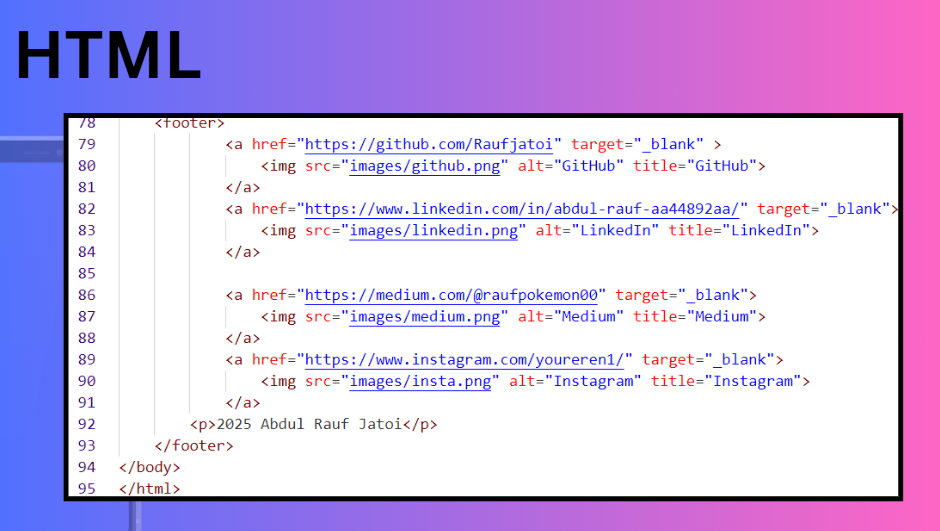
Finally, the last section for the HTML part is the footer section, the end of the website that can be mentioned with the section or footer tag. I used the footer here, and you can see I just added some of my social media icons and logos. The target tag and then the image's width and height can be customized in CSS. Here you can also see the alt tag, which is like the alternate tag if the image doesn't work. So, this was it for the HTML part. Let's see the CSS part of the website.
So after seeing the HTML, which was mostly the structure of our website, let's see the CSS code step by step that will style our structure by adding colors, padding, and stuff like that.
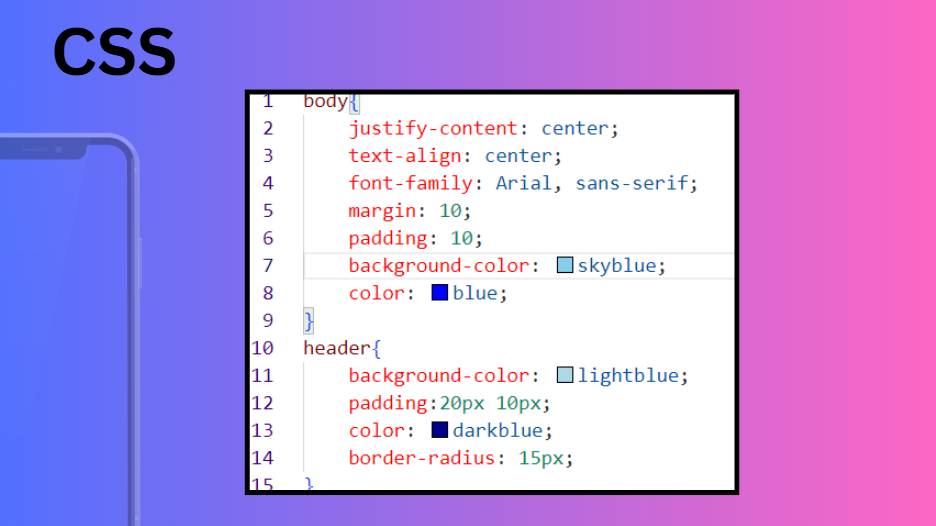
Above you can see I'm adding some style to the body and header tags that I added in the HTML file. First, I justify the content to the center and also align the text to the center using the justify-content and text-align properties. Then, I'm using specific font families; I added two in case one browser doesn't support the first one. I'm adding some margin and padding in pixels. Margin is like space outside the element or container, and padding is space inside the element, container, or even a div. After that, I add the background color as sky blue and the font color as blue. For the header, I add properties like background color, padding (20px 10px), font color blue, and then the border-radius property that defines the radius of the border. If I add more, the edges will be more rounded.

After the body and header tags, I added some style to the heading tags, anchor, and paragraph as you can see above in the code. In the h1 tag, I set the margin to 0px so it attaches to the screen, then set the margin-top and padding-top to 2px. I also set the color to dark blue. For the h2 tag, I added a background color, color, and padding of 10px 10px. Padding of 10px 10px means adding 10 pixels of space inside an element on all sides (top, right, bottom, left) around its content. You can also make it more specific by using padding: 10px 10px 10px 10px. Additionally, I added a border-radius of 15px for the h2 tag. For the anchor tag, I set the color to blue, and I did the same for the p tag. You can also simplify it by using a, p { color: blue; } to apply the style to both elements.
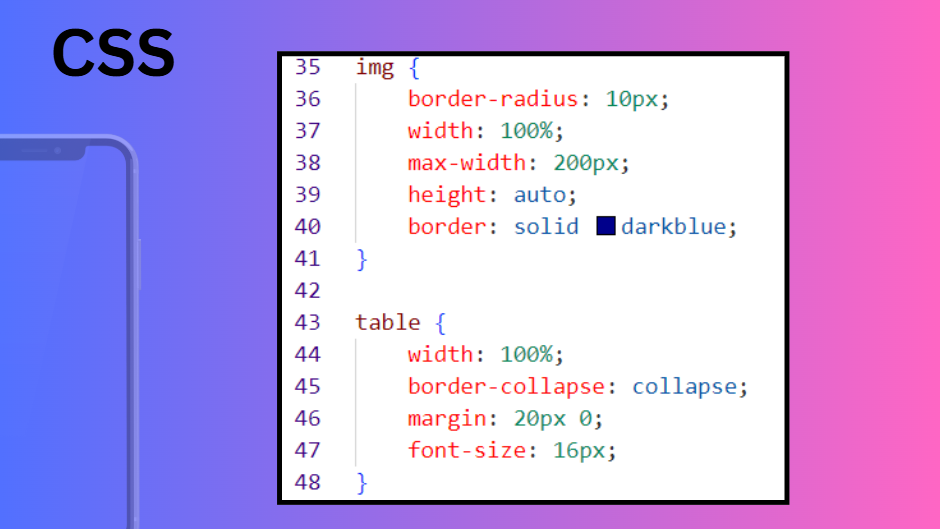
The styles for images and tables were as follows: for the image, I added a 10px border radius to make its edges a little rounded. Then, I set the width to 100% so it can be responsive, and I also set the max-width to 200px so it doesn't exceed that size. Additionally, I set the height to auto and added a solid dark blue border to give the image a cool look. For the table, I set the width to 100% and used border-collapse: collapse so the borders are collapsed into one, making it look more professional. I also added a margin of 20px 0px, which means 20 pixels of space vertically (top and bottom) and 0 pixels horizontally (left and right) around the element. Finally, I set the font size to 16px.
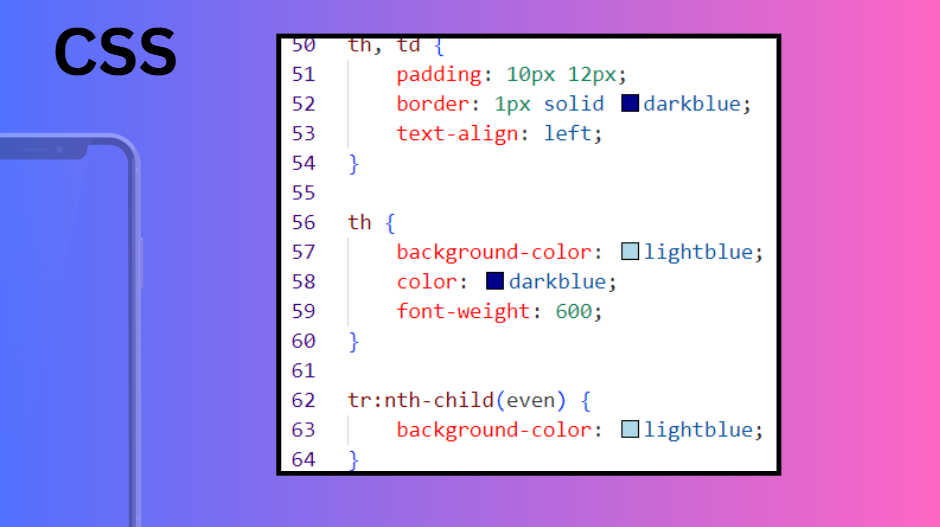
In the table elements like the <tr>, <th>, and <td>, I added some properties like padding, border, and text-align. In the <th>, I also added background color, color, and font-weight. The font-weight is the weight of the font, like bold, light, or normal, or you can choose a specific one. The tr:nth-child(even) may look weird, but it simply selects every even table row element and changes its background color to sky blue, so every even row after the odd one changes to that color. The odd rows have the blue color or body background, making it look a little nicer. When I did it, it looked nice to me, so I added it.
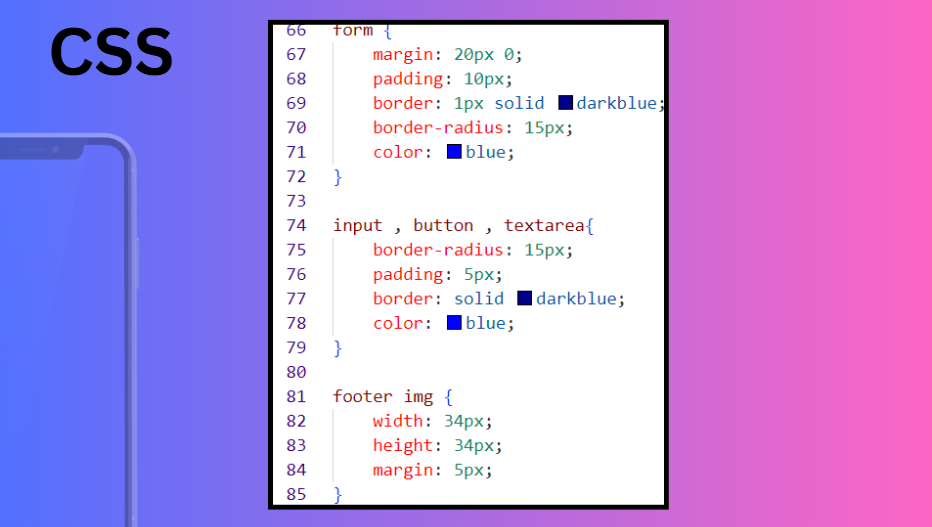
Finally, in the form, I added some CSS like the margin of 20px 0px, padding of 10px, border of 1px solid dark blue, border-radius of 15px, and color of blue. Then, in the input, button, and textarea, I added styles too, like border-radius of 15px, padding of 5px, border solid 1px dark blue, and color blue. Finally, in the footer img, I added a width of 34px, height of 34px, and margin of 5px. This was it; this was all the HTML and CSS code for my portfolio. Feel free to customize it and create your own 😊.

18 Jan 2025 , Abdul Rauf Jatoi