

Hey there, in this text-based tutorial, I will try to add a navbar to the portfolio we created in the previous video. You can see the navbar above. The code is super simple; it's the same from the previous text-based tutorial. I just added the navbar and some IDs to sections as we will use those now to navigate to the sections of the website. I also added a little bit of CSS to the navbar for hover effects and similar interactions. So let's start. 😊
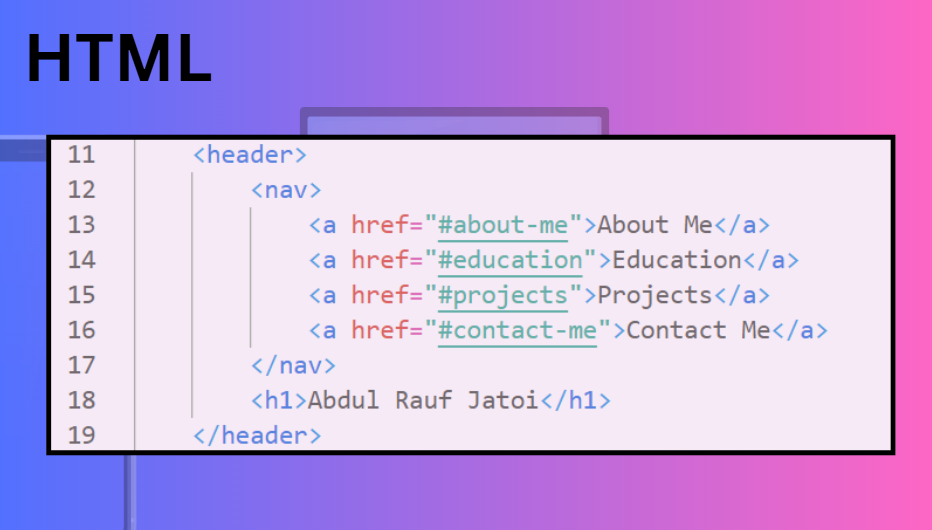
First, the HTML part. Most of the code is the same; I just added the navbar before the header section. The <nav> tag is for navigation, and then I added the <a> tags with links. The links are like #about-me, which refers to IDs in HTML. Now I can create those sections with IDs and link them. Whenever I click on a navigation link, it will take me to that section. It may seem a little complex, but wait until I show you the section, then you may get it.

After the navbar, I just updated those sections like the one you can see above and added the ID like the about-me ID above. Now, whenever I click the about me link in the navbar, it will take me to the about me section, and the same for the other sections too. If you didn't watch or check the previous video or text-based tutorial, check that out first before checking this because in that I explain the entire code for the portfolio. Based on that, I'm just explaining the navbar stuff and IDs here, not everything, because it's already been explained. 🙂
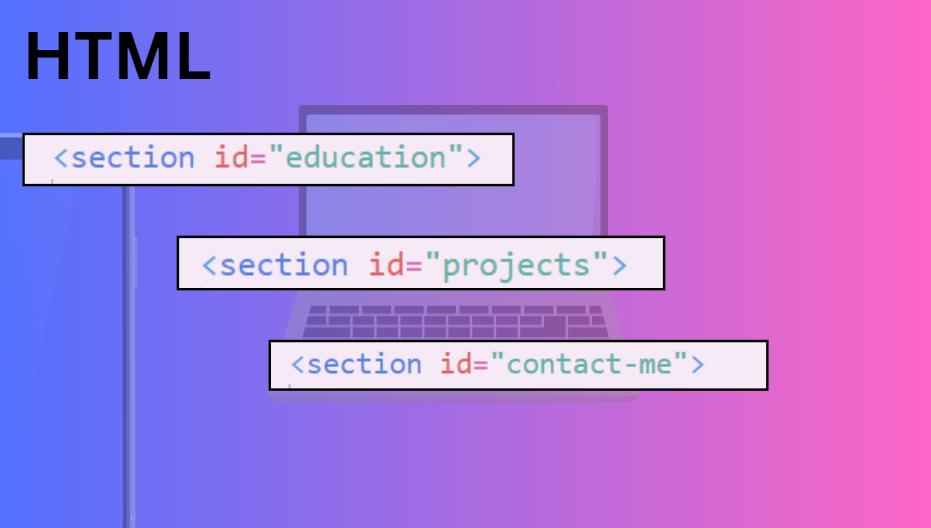
Here you can see I'm just updating other sections like the education, project, and contact-me sections by adding the IDs. Nothing else is changed. That was it for adding a simple navbar to your website. Now let's see the little CSS code i added for the navbar.
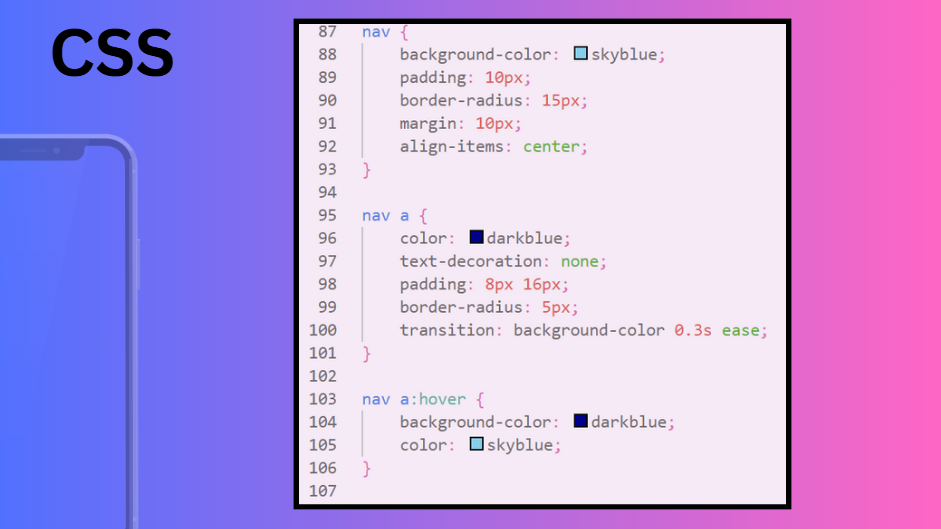
In the CSS, I added the basic style for the navbar. In the nav tag, I added properties like background color as sky blue, padding of 10px, border radius of 15px, margin of 10px, and aligned the items at the center.
Then, I styled the nav a to access the anchor inside the nav without changing other nav elements. I added styles to the nav anchor such as color of dark blue, padding of 8px 16px,
border radius of 5px, and a transition of 0.3 seconds on background color. The transition means the time it takes to change the color when the user hovers over it, and it has hover effects. Finally, I added the hover effect that changes the background color to dark blue and the text color to blue. You can see the final result below in a video.
Here is the final result of the code of navbar

19 Jan 2025 , Abdul Rauf Jatoi